Tuesday, December 28, 2010

Seth Martin & Friends Article


You may remember a few days ago when I mentioned that we (the Brainwrap crew) had been interviewed about our puppet show Seth Martin & Friends. Today the article ran in the Herald Dispatch and I couldn't be more satisfied with it. It's a pretty lengthy write-up that paints a nice picture of our ambitions, past accomplishments, and how we came to be. I have to give a huge thanks to the author, Dave Lavender, for not only hanging out with us in our non-heated studio but also for taking the time to figure out what we're all about. Brainwrap has been mentioned in the paper a couple times before and we've learned that it's very easy for misinformation to slip through. Not that it's been a huge problem or anything, but it just makes it all the more apparent that Dave really is a fan of what we're doing and wanted to do our efforts justice. So thanks, Dave! You definitely did more homework than you needed to when writing about a bunch adults who play with puppets. It's nice to have a bit of the spotlight pointed in our direction in such a professional manner.

"Group of friends finds success with YouTube skits"


Sunday, December 26, 2010

Seth Martin & Friends Christmas special


Enjoy a Seth Martin & Friends Christmas! I made the graphic from the last post specifically for this short. I was happy to actually be on hand for this shoot, and as we were setting up the props we were lucky enough to be interviewed by Dave Lavender for an article that will soon appear in our local paper.

And don't forget to become a fan of SMAF on Facebook.


Friday, December 24, 2010

Merry X-Mas!


Have a good one!


Thursday, December 23, 2010

Tink


Merry Christmas eve eve! The piece above was bit of a rush-job that I managed to squeeze into my busy holiday art schedule, and I'm glad I did. It was for an art contest judged by one of my favorite artists, J. Scott Campbell. The subject of the contest was "sexy fairytale character,"which is also the theme of Campbell's pinup calendars he's put out for the last two years. I had trouble coming up with a character that hasn't been done to death, so I settled on Tinkerbell when I decided that her small size and ability to fly would offer up some unique possibilities to create a fun image. I didn't win the contest, but there were a ton of entries to compete against and the winning drawing totally deserved it. Plus I'm really happy with the final piece, and I think it's something I would never have done if not for the contest.


Thursday, December 16, 2010

Snazzy Wallpaper


A wallpaper I put together some time ago just for fun. I wanted to do something that had sort of a simple and stylized look, and I also thought it would be cool to make one of those wallpapers that has shelves for you to "place" your icons on. Enjoy!


Wednesday, December 15, 2010

IGN's 2010 Gamer Girl Gift Guide


My friend Randall has brought to my attention that two of my shirts made IGN's 2010 Gamer Girl Gift Guide. It's quite an honor to be featured on a site like IGN with such a wide reach, especially for my women's apparel which is something I get a lot of requests to do more of. Speaking of IGN, does anyone else remember the early days of the internet when IGN was N64.com? I was probably in grade school, and it was a bare-bones site that only reviewed Nintendo 64 games. It's pretty crazy to think about how it grew from a site that looked like it was started by a teenager on a public library computer to the giant online presence it is today. Ah, internet memories.


Every once in a while I'll get some press that really makes me stop and think about how crazy it is that my artwork is getting noticed, and this is one of those times. I did a couple of drawings here on this drawing table I've had since I was a kid, sent them out through a cord plugged into the wall, and months later, through no further effort of my own, there is money being spent by a large company on professional models and photographers to produce the images of my designs you see here. It's a very, very odd thing to me when I really think about it, and I'm so lucky to have had my work pay off in so many interesting ways.

And for the obligatory plug, you can buy these shirts and many more here at my store!


Tuesday, December 14, 2010

Dating on a Budget


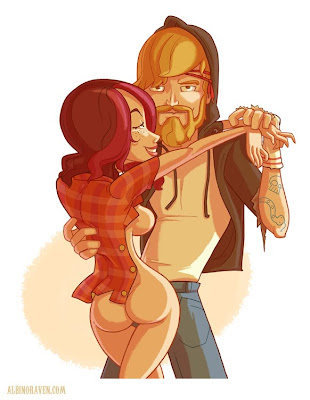
These are drawings from my latest assignment for Front magazine, an article about playing up your lack of money to attract women. Is it too late to warn against the adult nature of these images? (Well, no more adult than you'll see on a thirty foot billboard in Times Square, anyway.) At any rate, you can see how this is a continuation of the "hot chick" theme I mentioned yesterday. The article isn't so much full of actual advice as it is jokes, and the direction I was given was to draw "extremely sexy" women with a guy who resmbles a typical Front reader, though somewhat more slovenly and homeless looking. In the first and second versions of these pieces the guy looked a whole lot like my friend Kyle, which was bit odd, but I was just following their description and reference photos as best I could. It looks a little less like him in the final, but it's no so different that he can't tell people it's him if he chooses.


Monday, December 13, 2010

I have Returned! And, another Front Magazine post.

Hello there! It's been a while, and I'm sorry for that. I've been busy with plenty of projects but most of them I can't yet post for various reasons, including Funnyordie.com having exclusive press rights to a show I'm involved in, and the fact that I'll be giving away some art as Christmas presents.

I've also been fortunate enough to have some down time which I used for a vacation to New York and various other video game related activities.

That being said, I have still been building a nice little backlog of posts. I may just have to lump some of them together and declare this "hot chick week," which will be nice for those of you who are into that sort of thing.

For starters, here's a Front magazine, now a couple issues old, that features the "sexy student stereotypes" piece I was commissioned to do:


I even made the spine of this one! (The little goth girl head)


And they reused my drawing of Jonah Hex from the "scars" illustration that I did for a previous issue:


This is kinda funny to me because Jonah was originally featured in a drawing with several more characters where he was much smaller, and it just so happens that he was the character I chose to hide my initials in. I do that in most of my work for Front because the pieces don't always have backgrounds, or the characters may be shifted around on the backgrounds for layout purposes, so if I signed the drawing in the corner it would likely get erased away. So now there's a giant "GB" on this full-page Jonah's belt buckle.


Tuesday, November 23, 2010

George's Secret


A new shirt design that you can vote on now! Peter Mayhew was only hired to say he played Chewy to help hide George's terrible, terrible shame.


Friday, November 19, 2010

Grand Theft Happy Meal


A new shirt for sale! I created this design quite a while ago and I always felt like it turned out pretty well so I'm glad it's finally been made available. I also still think it would make a pretty sweet real life happy meal. Well, I guess it's not too kid friendly, so maybe one of those mighty kids meals would make more sense, whatever those are.

Buy the shirt here!


Wednesday, November 17, 2010

Modo De Vida


The good people at Gallery 1988 mailed me a copy of this issue of Modo De Vida, which featured my Mario's Closet illustration.


As you can imagine I'm not overly familiar with publications based in Puerto Rico, so I'll quote this from the magazine's Facebook page:

"Modo de Vida is about the good life, good taste and the seeking of a higher standard of Living. Exceptional Homes, featured throughout our pages. Fine dining, Travel, Fashion, Jewelry, Automobiles and the world of art."

Hear that? Buying my art means a higher standard of living! The magazine seems to be written in Portuguese which I'm having trouble translating via translation websites, but I can tell that they gave me credit and spelled my name correctly, which is more than I can say for my US based water company that sends my bill to "Glen Brogen."


Tuesday, November 16, 2010

Exploring Mars


A few weeks ago I received some copies of the Exploring Mars coloring book, which was commissioned by NASA and the Mars Society to get kids excited about some day visiting the red planet. Isn't that an amazing cover? As I mentioned some time ago, I was able to contribute to this book via the Autumn Society.


Here's my coloring page!


And one of the books was signed by Dr. Robert Zurbin, the aerospace engineer who's at the forefront of the effort to make a manned mission to Mars a reality.

Out of all the amazing projects I've been able to participate in this year this one really stands out. I couldn't be happier or prouder to have been a part of this.


Friday, November 12, 2010

The Whole Gang


It occurs to me that this would be pretty funny to post with no explanation or context, but I guess I'll tell you anyway! It's my latest piece for Front Magazine, this one for an article about putting together the perfect stereotypical gang.

We have Peter Venkman as the ladies man, Donatello as the brains, Chewbacca as the muscle, Screech as the wild card, Dobby as the mascot, and the A-Team van as the vehicle.

I really like Chewbacca in the wrestling getup. Sadly I can't claim credit for that as it was in the commission description, though it was my idea to give Screech a child's toy guitar. I'm not too fond of Dobby or anything Harry Potter related, but neither are the people at Front as they told me to make him look "hateable," haha!


Wednesday, November 10, 2010

Mothman Prints For Sale


I've had a lot of requests for this one, especially locally, so here it is! $12.95 gets you an 11x14 print. Buy one here!


Friday, November 5, 2010

That Pattern Looks Familiar...


A new T-shirt design that you can vote on here. I love Plastic Man!


Thursday, November 4, 2010

Artists in a Half Shell Shirt


New shirts up for sale! As I said when I first put this design up for voting, all those art history classes and hours of Saturday morning cartoons finally came in handy. You can buy the guys shirt here and the girl's version here. Also don't forget to check out the rest of the stuff in the store!


Sunday, October 31, 2010

Happy Halloween!


Here's another piece I created for the Artmares show in Charleston, WV. It's always fun to touch on a bit of local pop culture, so I decided to do some silly caricatures of two popular news anchors from this area, Tim Irr and Tony Cavalier. If you're from the greater WV area, southern Ohio, or eastern Kentucky, then you're probably very familiar with these guys and the WSAZ evening newscast (our local NBC affiliate.)

I was a little concerned about this piece because it's based on real people, both of whom I've met in passing, and I didn't want it to be offensive in any way. I thought it would be funny to take guys who deliver serious news to us night after night and make them look like a couple of giddy kids with their trick-or-treat bounty. I think I succeeded, but I do have to say that I got some very strange reactions to this piece. Well, maybe I shouldn't say strange as much as very specific reactions. Most people will look at a piece of art and react with "Hmm," or if you're lucky, "I really like this one." But with this piece everybody seemed to have a very unique interpretation, including people who didn't even recognize the newscasters, which was quite curious.

At any rate, a former WSAZ photojournalist bought the piece. He was a nice guy who totally got the joke, so I'm happy he enjoyed it!

Here's a pic of my pieces hanging at the show:


I had a great Halloween this year thanks in no small part to all those close to me, so here's hoping yours was a good one too.


Wednesday, October 27, 2010

8-Bit Calavera


This is my piece for the 8-Bit Calavera show at the Ground Kontrol arcade in Portland, Oregon. The show includes work from 40 artists who were asked to decorate NES cartridges in the style of traditional Dia de los Muertos skulls. NES carts are already shaped like stylized skulls, and the final pieces will be displayed in the form of a larger skull, as you can see on the invite:


I tried to loosely tie my piece into the death theme by thinking about what happens to patients in Dr. Mario if you lose a round. Do they die? Just stay sick? ...Or does Dr. Mario even have any patients? I think the plumber's legal ability to practice medicine has been in question ever since the game debuted. At any rate, Dr. Mario is one of my favorites so I decided to draw the virus characters from the game and display them by cutting a special skull-shaped mat for the front of the cartridge. I'm not much of a painter to begin with, so this was a nice way of not having to work directly on the cart itself since it has a series of ridges that create a complex surface.

Here's the digital artwork of the viruses for a better look:


If you're in the Portland area please check out the show!


Friday, October 22, 2010

Process, Part 5

Part 1 here.
Part 2 here.
Part 3 here.
Part 4 here.

This is the last of my process posts so I'll be bringing it a close by showing how I add depth to the characters with "shading."

As I've said in my other posts, there's not too much of a trick here, just drawing shapes and having a good eye for visualizing the characters in 3D space. You need to be able to predict where light will hit their bodies and where it won't. I find that I don't have to be super realistic with this or anything, I just have to do it in a way that makes sense, and from there I can have fun with it and try to come up with interesting shapes.

So how exactly did I make this:


Into this?


I started out by creating a new layer and making it around 40 to 50% transparent. Then I picked a dark color, usually a dark red or purple, and colored in the areas that I wanted to be darker. I typically use a custom brush I've made that has a bit of a chalk look to it. I really like the look of this brush and I use it on most my of work.

The dark color, when placed semi-transparently over the base color, just naturally creates a darker version of the colors beneath it. If it doesn't look quite right on a certain color then I'll go back and change it. For example, in the image above you can see how the shadow on the Mothman's T-shirt is more purple, where the shading on his skin is more turquoise.


This is the exact same shading featured in the previous image, but here I've turned the opacity back up to 100% so that you can see what the layer looks like when it has no transparency. I don't always do my shading this way; sometimes I just pick each individual darker color with no transparency added to the layer, but doing it like this is much easier on more complicated drawings, especially for things like the flannel shirt. With this method I don't have to darken each of the flannel checks individually.


Here is a subtle effect I added where I made it look like his eyes are glowing red. I made two red shapes on a new layer and then blurred them to create a glowing look.


On another new layer, I drew reflections on his eyes and some stubble on his face. I like these reflections because they are meant to be in the shape of the light bulb he's chasing, but adding the filament lines created little hearts, which also made the reflections look sort of like skulls.


Next, I added a new layer where I essentially did the same glow effect I used on his eyes, only this time I made it look like the light is illuminating his face, hand, and hat with a yellow color. I used this sparingly on all the parts of the characters that were closest to the light source, and the parts I wanted to emphasize.


This is a before and after of what I call my "cleanup layer." Most of the time I make my shapes quickly rather than carefully so that I can get a feel for where the drawing is going. So for more complicated drawings I put a new layer above all the others and use it to tidy up all my edges and things.

After all of that, I ended up with something like this:


And finally, I added some text to complete the movie poster feel...


...and I got the final image! I looked at a lot of old horror movie posters to come up with ideas for the types of logos and text I should add. I love what I call the more "classic" logo elements, like rainbow colors, globes, etc. I went to a free font site to find a good font for the movie title, and I warped the text with Photoshop to give it a more dynamic feel.

So there you have it, all my dirty little art secrets. It seems kind of weird to give out all this advice because I am entirely self taught in Photoshop, and most of the time I assume that I'm doing all this stuff in a backwards or overly complicated way.

I sincerely thank anybody who read of all these, and I encourage you to check out the past posts if you're interested and missed any. You can find the links at the top of this post.

After all is said and done, I'm very happy with this piece and I think it's on its way to becoming one of my favorites. I love that we have such a prominent folklore monster like the Mothman here in my home state of WV, and I encourage you to read more about him here. We also have the Flatwoods Monster, but that's for a future piece!


Thursday, October 21, 2010

Process, Part 4

Part 1 here.
Part 2 here.
Part 3 here.
Part 5 here.

The Photoshop portion of today's post will be...brushes! Brushes are your best friend if you're using a tablet.


This is the brush palette in Photshop where you can select your brush and set all kinds of options for it. The different brushes simulate different types of media, like paint, chalk, markers, etc, and even if they aren't always terribly realistic they can still create really cool effects. The main option I use is to set the size of my brush stroke to change with the pressure of my tablet pen. What that means is: the harder I press down with the pen, the thicker the line.


Here you can see where I have made a couple dark lines and varied their width by pressing harder or lighter as I drew them. At first I wasn't sure if I could get comfortable with this feature or would even have a use for it, but it has made line work so much easier and now I can't live without it. You can set tons of additional variables, such as changing the color of your line as you tilt the pen or roll it in your hand, but I find that one effect is enough to keep track of.

Now, back to the Mothman drawing!


What I've done here is to take my pencil drawings and put them on a single layer above my background, then alter the opacity of that layer so that I can see the background underneath. This helps me make sure that the characters are placed properly on the background, and from here I essentially just trace my pencil lines with the brush tool, putting the new lines on their own layer.


You can see how I just trace the image. Typically I do line work first, but I decided to do this drawing in a way that uses as little outlines as possible; sort of a Samurai Jack style. So instead of the dark outline you see above, I'll be drawing colored shapes and then filling them in. So just to emphasize, the black outlines you see here are to demonstrate how I outline shapes with the brush tool and are not part of the final drawing.


In this image I have most of the Mothman's body drawn in, and you can see how it's basically just a big coloring book. I used the pencil drawings as guides to draw all the shapes in, and I picked the color of each shape as I came to it. The Mothman's flannel shirt I created by drawing horizontal and vertical stripes on different layers, then making the layers slightly transparent.

I like to mess around with my colors until I get them exactly how I want them, so let's say that as I'm filling in the red of Mothman's eye I decide that the color is too dark. I would then just select that shape and lighten or darken it, change its hue, etc, until I'm happy with it.

Once I completed all the colored shapes for the entire drawing, I created a new layer and added in minimal line work to help distinguish certain shapes and make the drawing less confusing.


Here's a portion of the drawing before and after line work. Another thing you might notice here is that I lightened the part of the girl's dress where there is no body underneath, which silhouettes her legs and makes it seem as if light is shining through the fabric.

Again, this drawing is a special case because of the style it's in, and when I do "normal" pieces where everything is outlined I do the line work first and then the coloring second, on a layer below the lines.


This is a full view of the piece after all the colors and line work are completed. You can also see that I have some text in there, which I created by using the text tool and then distorting it so that it conforms to the truck door. The text on the "Welocme to West Virginia" sign I drew by hand because that was easier and more accurate than trying to match the font!

Tomorrow...shading!


Wednesday, October 20, 2010

Process, Part 3

Part 1 here.
Part 2 here.
Part 4 here.
Part 5 here.

Today I'll show you how I create a background! But first, you need to understand how layers work in Photoshop. I don't want to turn this into Photoshop 101 or anything, but I do want it to be accessible to as many people as possible, including those who may not have a full working knowledge of Photoshop or might not be artists themselves. For that reason I want to at least explain the concepts behind some of the tools I use.


Layers are a feature that you absolutely cannot live without as a digital artist. If you look to the right in the the image above, you can see that each element of the smiley face is on a different layer. Notice in the tiny icons how the facial features are on a layer above the black outline, which is above the yellow circle, which is above the white background. On the left, you can see that all of those things overlap to form a completed smiley face. Think about it like drawing on transparency sheets and laying them all on top of each other. The reason this is important is because, well, let's say that this is a painting on a canvas and you decide after you're done that you want the smiley face to be green. You would have to repaint the whole thing, carefully edging around the eyes, mouth, and outline, right? Well, with this setup the yellow circle is on it's own layer, so all you have to do is select that layer and change the color, which takes all of three seconds.

Now that we have that out of the way, back to my Mothman drawing. I tend to make my backgrounds fairly simple, so I've reached the point where I'm comfortable creating them entirely in Photoshop with no need to do much more than a thumbnail on paper. (Unless it's a particularly complicated scene or uses specific buildings, etc.) For this background I want a to draw a bridge with a mountain range behind it.


Since my scene takes place at night, I started out with an all black canvas and used a textured brush to add some very subtle color gradation from top to bottom to give it more depth. (Brushes will be in the next post, so don't panic.) My, isn't that exciting to look at? I know the gradation may seem subtle to the point of useless, but stuff like that really helps, trust me.


In a new layer, I drew a shape that would form the sky behind the mountains. Within that shape, I again created a gradation of color with a brush to give it depth. See how the slight changes in color make you think "sky" rather than just "pointy pink shape?"


I added more layers for more elements of the background, such as the road, railings, stars, bridge support, and the soft light on the edge of the mountains. There's no real trick to adding this stuff in, you just draw it in there with the brush tool, or polygon lasso tool for bigger shapes that you want to fill in quickly.


As much as I like the colors I had in the background, I was still thinking about the fact that brightly colored characters were going to be placed on top of it. For that reason I changed the colors to be much more subtle and muted so that they wouldn't compete with the characters as much. I did this by making a new layer above all the other layers and filling it with a solid color, then messing with the layer's settings and opacity. Think about it as if you have a piece of colored glass that you're looking through, only you're able to control its color and the amount of light that passes through it.

And that's the finished background! Again, there's not as much of a trick to this as you would think, it just takes all the time and work you would expect to put into a nice looking drawing

Tomorrow, the characters.